
Training prayer is essential to progressing your account, especially if you plan on taking tougher PVM challenges and quests.
In this 1-99 Prayer Guide, I’ll go over the many ways we can train the prayer skill. I’ll show you my recommended method, which is coming up shortly, and also some additional info on how to cut down costs.
I’ve updated this guide with the brand new ‘Varlamore Prayer Method‘ which shook up the meta!
| About the author Hi! I’m Dean, the founder of OSRS Guide. I’ve been playing OSRS since 2006 and like many of us, I was never really able to ‘shake’ the game. I enjoy experimenting and discovering new methods and bringing these to life in my guides. p.s. I’m also on Youtube. |
Why I use dragon bones

Most prayer methods involve using bones to sacrifice to some kind of altar to get experience. This guide assumes you use Dragon bones, the most popular bone for prayer training.
It’s possible to use cheaper bones (e.g. big bones) and save money, but this will slow down your exp rates. In the end, it’s up to you!
Prayer Goals & Cost Calculation
Prayer is an expensive skill to train, so it’s best to break it down into smaller goals instead of going all the way to 99 right away.
Most of you reading this are probably looking to get somewhere between levels 43 and 77.
If you want to save some money on the way, you should know how to get the most out of your dragon bones.
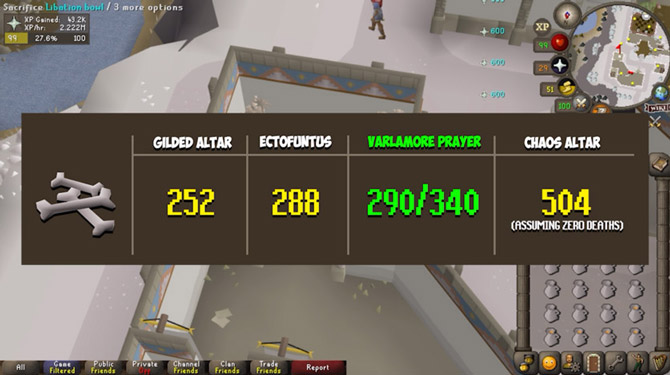
Here’s a table that shows you exactly how much exp you get for a Dragon bone at each altar.
| Gilded Altar | Ectofuntus | Varlamore (regular) | Varlamore (sunfire) | Chaos Altar |
|---|---|---|---|---|
| 252 | 288 | 290 | 340 | 504 |
This next table shows you the cost of each method to get to your preferred level (also based on dragon bones).
| Prayer lvl | Unlocks | Varlamore Prayer (reg) | Varlamore Prayer (sunfire) | Gilded altar | Chaos altar |
|---|---|---|---|---|---|
| 1-43 | |||||
| 43 – 52 | |||||
| 52 – 60 | |||||
| 60 – 70 | |||||
| 70 – 77 | |||||
| 77 – 99 | N/A |
P.S. Here’s a link to the google sheet. I used to make these calculations, so you can update the prices yourself.
As you can see, the Chaos Altar offers the most bang for your buck (each dragon bone = 504 exp), but that is assuming you never die and since it’s in a PKing hotspot in a multi-combat zone of the deep wilderness, that’s a tough ask…
The better way to train is via the brand new Varlamore Prayer method. This new method overshadows older methods such as Ectofuntus & Gilded Altar!
Let’s look at the training options!
Varlamore Prayer Method (recommended)
I’ll start with the new Varlamore method first, as it’s my new favorite.
Here you can get 290 – 340 exp per Dragon bone (depending on whether you use sunfire or regular wine) which is more exp than you receive at the Gilded Altar or Ectofuntus.
It’s still less than you get from the Chaos Altar, but you don’t have to enter the wilderness and risk losing bones.
Varlamore prayer is done at the Teomat (the top of the Ralos’ Rise mountain), and requires level 30 Prayer.
You will need to get access to Varlamore first, so check out my Varlamore Guide if you haven’t unlocked this magical new region yet.
This method involves using Blessed Boneshards (which can be created from bones) and offering them up at the libation pool with either blessed jugs of wine, or blessed sunfire jugs of wine in your inventory.
I won’t cover the method in depth in this guide, as I’ve already written a separate Guide for Varlamore Prayer.
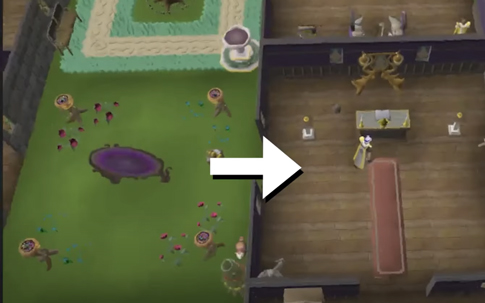
Here’s a quick peek at the gameplay loop:
- Travel to Teomat with a full inventory of jugs of wine (27) and blessed bone shards (stackable)
- Bless your jugs of wine at the Exposed Altar
- Run northeast to the libation pool and offer your bone shards until your prayer runs out
- Recharge prayer at the prayer altar
- Continue offering bones until you’re out of jugs of wine
- Teleport to bank and repeat
For the visual learners, check out my 3-minute guide below!
Gilded Altar Method
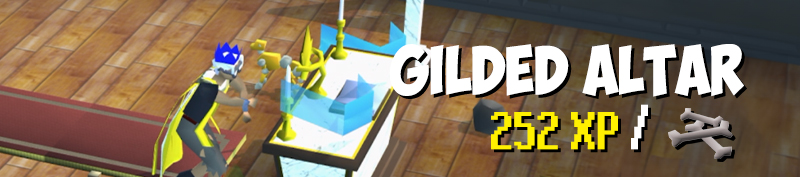
Next up is the Gilded Altar, my personal favorite before the arrival of Varlamore.
Sacrificing a bone at a gilded altar rewards you with 350% exp per bone. Meaning you get 252 exp per Dragon bone used on the altar.
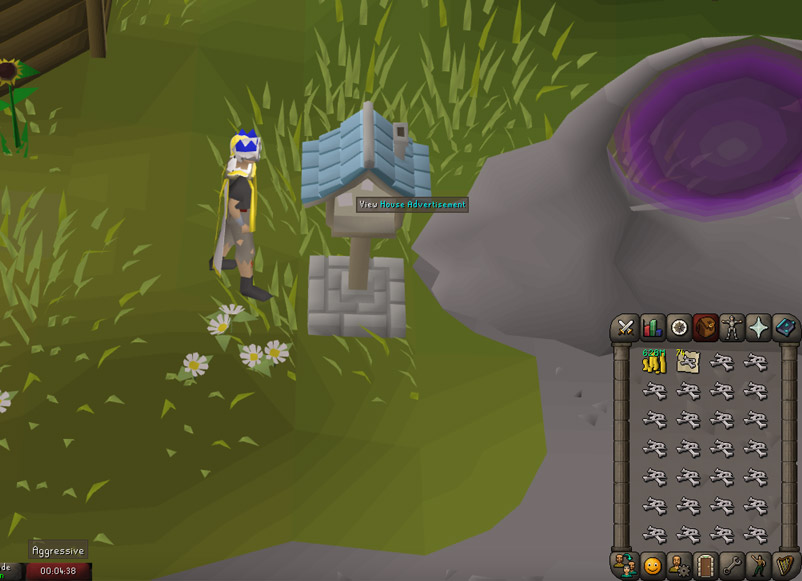
Gilded Altars are located in other players’ homes. You can find these homes by viewing the ‘Advertisement board’ in World 330 (House Party world) in Rimmington.
This method involves continuously running in-between another players house (via advertisement board) and the general store next door, where an NPC named Phials un-notes your bone for you in exchange for 5gp per un-note.
Here’s an example of the gameplay loop:
- Enter P-O-H via Advertisement board
- Start sacrificing bones on the altar
- Exit P-O-H
- Use bones on Phials and hold 3
- Right-click ‘Visit-last’ on the advertisement board
- Repeat!
For a visual example, check out my 1-minute explainer video below.
What you need
All you need for this method is your cash stack and your Dragon bones (noted).
How to get there
The popular house portal for house parties is located in Rimmington. So make your way over there.
You can either teleport via a home teleport tab (if your house is located in Rimmington) or walk here from Falador.
Finding a Gilded Altar
Once you’re in Rimmington, hop to world 330 and use the ‘Advertisment board’ to find a house with a Gilded altar.
Choose one that has a gilded altar.
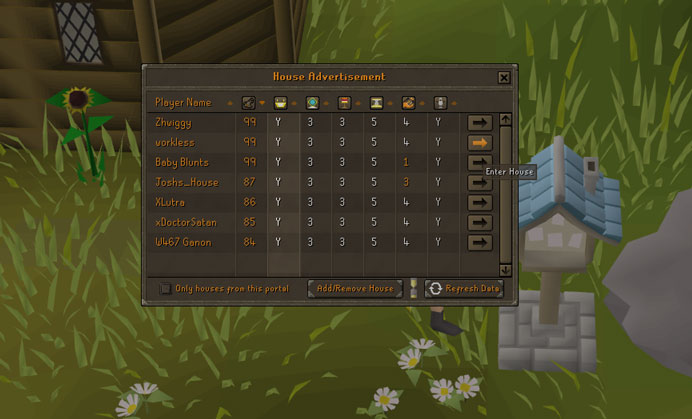
Ideally, the Gilded Altar is located right next to the house portal as seen below.
Un-noting bones
You can un-note your bones by using them on the NPC Phials in the general store next to the house portal. Hold 3 to automatically select un-note all.
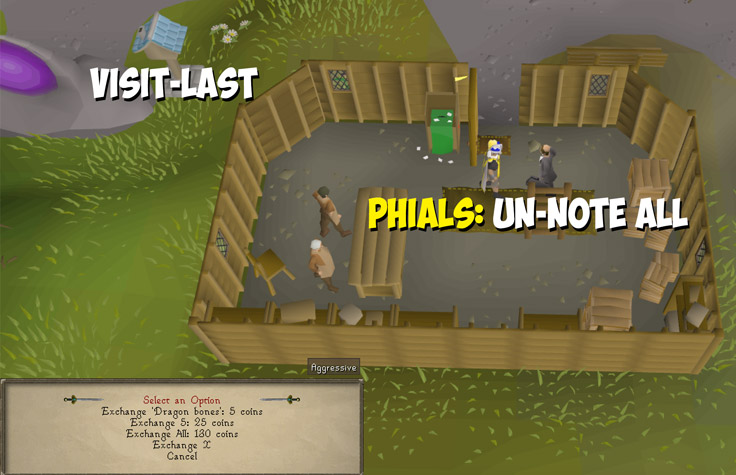
Once un-noted, select visit-last on the Advertisement board (not the portal!) to quickly return to the house with the Gilded altar.
Essential Plugins & Settings
If you want to make things easier for yourself, you should be playing the game using the Runelite client, and have the Menu Entry Swapper plugin installed.
This plugin allows you to swap the left-click ‘bury’ option from Dragon bones to ‘use’, so you don’t have to continuously right-click on your bones.
If unclear, check out the video guide above.
Train AFK or use tick-manipulation
There are two ways to train here:
- Use your bones on the Altar and wait for your character to finish (AFK, up to 200K EXP/hr)
- OR continuously click in-between your inventory and the altar (up to 700K EXP/hr)
Obviously, the second method is faster but more click-intensive. You can check it out for yourself which method you prefer. I recommend you do a combination of both to keep yourself sane.
E.g. every hour, use tick-manipulation for 20 minutes. This will speed up your EXP rates but still keep you sane during your prayer training.
Chaos Altar Method (high risk)
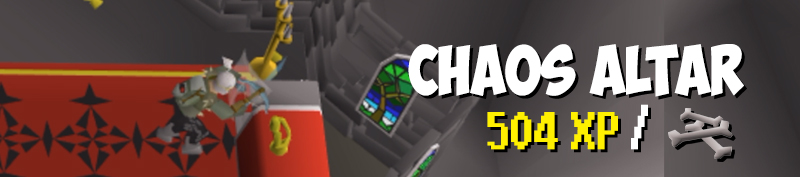
A bone efficient alternative to the Gilded Altar, is the Chaos Altar, which is located in level 38 Wilderness in a multi-combat zone.
You have a 1/2 chance your bone won’t be sacrificed, which results in an average 504 experience per Dragon bone.
If it weren’t so risky, this cost-efficient method would be higher up on my list.
But as this altar is crawling with PKers, you have to bring small inventories to avoid losing a lot of bones. And ‘playing it safe’ does cut into your exp rates.
Nevertheless, this is a great altar if you’re looking to get the most out of your Dragon bones.
The gameplay loop is as follows:
- Teleport to the Lava Maze via your burning amulet
- Run west to the Chaos Altar
- Use all your bones on the altar
- Once all bones are gone, run to the Chaos Fanatic (northeast from altar) to quickly die and return to Lumbridge
- Repeat!
Follow my 1-minute quick guide below for a safe approach to this method.
How to get there
The Chaos Altar is located WEST of the Lava Maze.
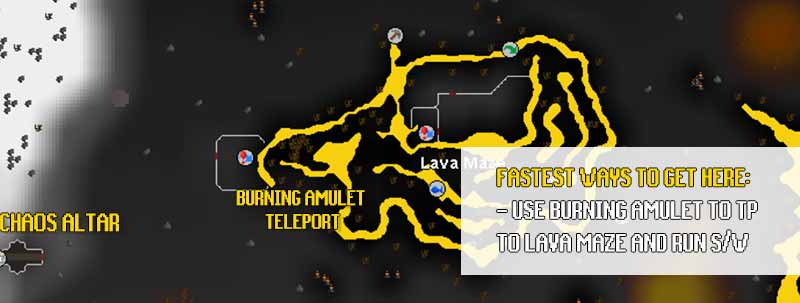
The easiest way to get here is by teleporting to the Lava Maze via a Burning Amulet (available at GE) and running west.
What to bring
All you have to wear is a Burning Amulet (to teleport there), and optionally a D’hide body and chaps.
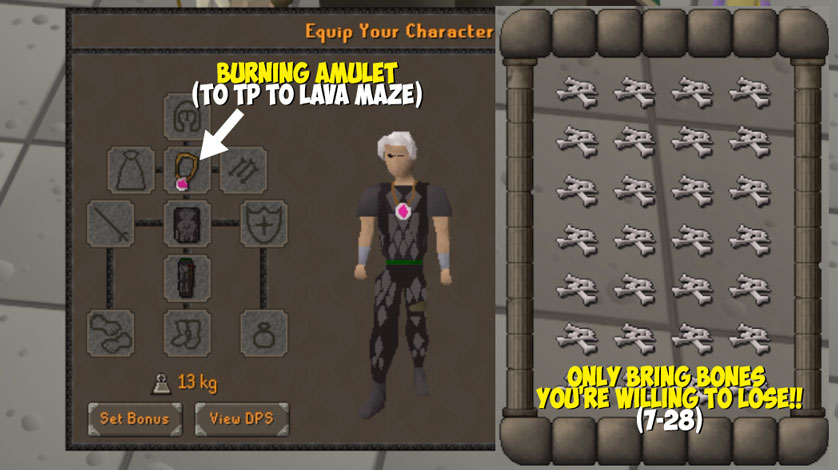
You can also go naked, allowing you to save 2 extra bones if you die. But the d’hide + protect from magic is often enough to ‘delay’ a PKer so you can finish sacrificing your bones before you die.
You can also bring a Dinh’s Bulwark for extra protection if you have it.
Only bring the amount of bones you’re willing to risk. This could be anywhere from 7 bones to a full inventory.
Important Settings
Make sure your Auto-retaliate is toggled off, this prevents your character from running toward the enemy and instead, you can focus on finishing all your bones on the altar.
Turn on PK skull prevention and hide player attack options to prevent yourself from skulling on other players.
Also, set your quick prayer to protect from Magic.
Essential Plugins
There are three Runelite Plugins I recommend you use to make prayer training easier and also avoid PKers.
The Menu Entry Swapper plugin should be used to swap the left-click option on bones from ‘bury’ to ‘use’.
Next, the Player Indicator plugin should be used to make PKers more visible both in-game and on your minimap.
Enable these two options:
- Draw tiles under players
- Highlight others
And finally, enable the World Hopper plugin.
Here we add a shortcut for world-hopping (e.g. I use CTRL + SHIFT + SPACE) to quickly hop to another world.
Also, change your region settings to make hopping less predictable (you won’t just hop to the next world).
If unclear, check the video guide.
Budget prayer alternative: Ensouled Heads

There’s one method that saves even more money than the chaos altar: re-animating ensouled heads.
This involves buying ensouled heads from the GE, and re-animating them at the Dark Altar. You’ll need the required magic level and runes to cast the spell, and also some combat gear to slay them.
The exp rates for this method are slower than any other method, but it can be a good way to save money on your way to your prayer goals.
Here’s an example of the gameplay loop:
- Teleport via a Fairy Ring to C-I-S
- Run to the Dark Altar and cast the re-animate spell (speak with Tyss if you aren’t on the spellbook yet)
- Slay the monster you reanimated
- Cast the spell again
- Repeat until inventory is empty, teleport to a bank to resupply
Or for the visual learners, follow along with my 30-second quick guide.
How to get there
The Dark Altar is located in the Great Kourend just underneath Wintertodt.
You can easily get here by using Fairy Ring code C-I-S, which teleports you right next to the Dark Altar.
If for some reason you don’t have Fairy Rings unlocked yet, teleport to Wintertodt via your Games Necklace and run from there.
Swap Spellbook
To swap to the Arceuus Spellbook, speak with Tyss at the Dark Altar.
Inventory & Gear
Your inventory should contain:
- A rune pouch with runes for the re-animation spells
- A dramen staff (to use fairy rings)
- 25 Ensouled heads
- A bank teleport
As for your gear, equip the best combat gear you have.
Which Ensouled Heads to use
I recommend checking out the Prayer Calculator to help you find the best Ensouled Heads to use for your Magic lvl and budget.
Fill in your current lvl and goal lvl and the calculator will output the cost!
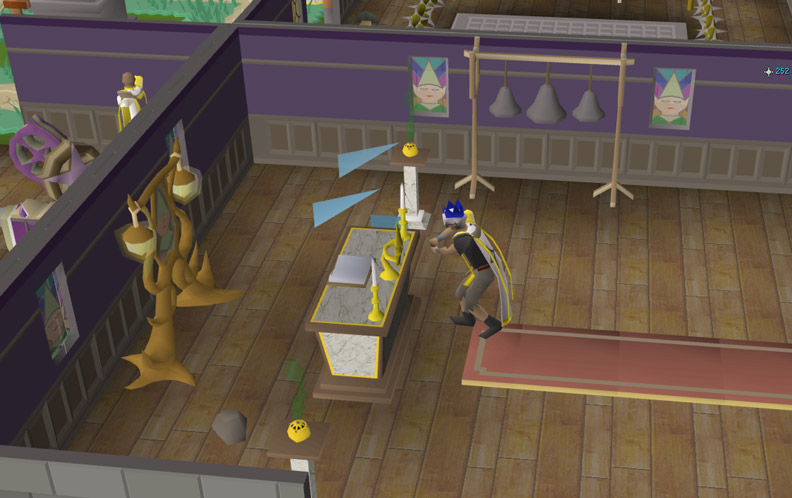
Ectofuntus Method (for ironmen)
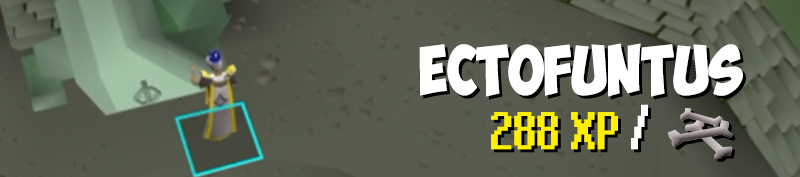
Ironmen who don’t want to do Varlamore Prayer or risk their bones at the Chaos Altar, can run the Ectofuntus instead.
This method offers 288 exp per Dragon Bone offered.
The gameplay loop is as follows:
- Use Ectophial to teleport to Ectofuntus
- Go down to the basement & fill your buckets with slime
- Teleport again via Ectophial
- Go upstairs
- Use your bone on the loader and wait for your character to finish
- Teleport again via Ectophial (gets you downstairs faster)
- Click on the 9 times to Worship and get your prayer experience
- Teleport to Castle Wars (Ring of Dueling)
- Bank and repeat!
For a visual example, follow along with my 50 second quick guide below.
How to get there
To get to the Ectofuntus, teleport via the Ectophial from the Ghosts Ahoy quest.
Inventory & Gear
You don’t need any gear for this method except for a ring of dueling or another bank teleport.
Your inventory should contain:
- Ectophial
- 9 Dragon Bones
- 9 Pots
- 9 Buckets
Or you can bring buckets of slime if you have stocked up on those beforehand.
Summary
And that’s a wrap on all the training options for the prayer skill!
The arrival of Varlamore truly changed the skill, as I expect this new method will become the new meta for prayer training, knocking the Gilded Altar from its position.
Don’t get me wrong though, the Gilded Altar is still a good method, with a slightly chiller gameplay loop compared to Varlamore’s prayer method.
The Chaos Altar remains in a good position, it’s more economical than Varlamore Prayer, but comes with the risk of losing bones.
Ensouled heads continue being a ‘niche budget alternative’ to prayer training.
The only real ‘loser’ is the Ectofuntus, which has been largely overshadowed by the Ralos Rise prayer altar. I expect most accounts who would run the Ectofuntus, to replace it with Varlamore prayer instead.
But only time will tell!